
Hiring? Flexiple helps you build your dream team of developers and designers.
React Hooks – Learn by building a Notes app

Akash Joshi
Last updated on
What are React Hooks?
React just introduced Hooks. Even though React Hooks may sound complicated, they actually are pretty easy to understand. They are a way of building components through functions, without using complex class structures.
In this article, we’re going to learn how they work by building a simple app.

Table of Contents
Introduction to React
Let us first start with an understanding of React.
React is a UI building framework which helps you to build well-managed & well-structured Interfaces by abstracting away the main complications faced while building them.
If you are building a UI which reacts to changes in related data, React is a very good fit for your development stack.
Now let’s start by learning about Components.
What are Components?
In React, a component is a piece of the UI which holds its own data, referred to as state, and returns rendered HTML based on the data.
Components are also responsible for their own state. This means that functions updating component state need to be present in the scope of the component. It results in well structured code which is easy to read & understand.
React also doesn’t enforce the granularity of components. A component can include as many or as little UI parts as you feel are required.
In the next section, we shall discuss the difference between class components & components using Hooks.
Comparing Class Components & Hooks
Class components are written in an object oriented way, with each function written as an object of the class and extensive use of “this” operator.
class Button extends React.Component {
    handleClick = () => {
      this.props.onClickFunction(this.props.incrementValue)
    }

    render() {
      return (
        <button onClick={this.handleClick}>
          +{this.props.incrementValue}
        </button>
      )
    }
  }
As you can see, it makes the code difficult to understand & read.
This used to be the preferred way of writing components in the past because state handling & lifecycle methods were not usable in Functional Components. But now, the introduction of Hooks makes Functional components just as useful.
An example:
const example = () => {
    const [count, setCount] = useState(0);

    return (
      <div>
        <p>You clicked {count} times</p>
        <button onClick={() => setCount(count + 1)}>
          Click me
        </button>
      </div>
    );
  }
Even if you don’t understand Hooks at this stage, you can still observe that this code is much easier to understand. Every useable state is defined as a constant and definite, understandable actions are taken on each of the states.
In the following sections, we shall learn React Hooks by building simple functional components. While doing so, we would have built a fully functional Notes App.
Tutorial – Building Notes App using React Hooks
Prerequisites
- Using React will require Node & npm to be installed, which you can get here.
- I have set up boilerplate React code using NextJS here. Clone it to get started relatively instantly.
Action Points
- Open a terminal & cd into the directory.
- Run npm i to install all dependencies.
- Run npm run dev and go to http://localhost:3000 to see webpage of your server.

1. Creating a functional component in React
We will start the tutorial by creating a simple functional component in React.
Go to pages/index.jsx. The file currently implicitly exports a functional React component by default, which just outputs Hello & has no props or state of its own. Tinker around with the HTML to see changes on the webpage.
To move one step forward towards making our Notes app, we will call a component inside this component, which returns a list of notes, from a passed data array.
We will create a component that accepts an array as input and returns the notes.
const Notes = props => props.data.map(note => <div>{note.text}</div>);Yes, it’s that easy to create a Notes component using functional components. This piece of code takes props as input and passes it into a function. The function iterates over the array using a map and returns the required divs.
Now, we will create an array containing the text of each note.
const data = [{ text: ‘Hey’}, { text: 'There' }];Next, in our default component, let’s pass this variable to the above component to get a rendered list.
const Notes = props => props.data.map(note => <div>{note.text}</div>);

  export default () => {

   const data = [{ text: 'Hey }, { text: 'There' }];

   return <Notes data={data} />;

  };
This gives you a page with the desired components.

This is a simple component. Next, we will be adding the ability to add tasks to the list by using the useState hook.
2. useState hook
A. Understanding useState hook
The first hook we will be using is the useState hook. It allows us to maintain state within a component without using the messy this statement present in class components.
Using a state hook requires an import from react:
import { useState } from 'react';A state hook takes initial state as input and gives you a variable to access that state and a function to update the state as output.
const [state, setState] = useState(initialState);We will use this in our code and pass our data variable to it as the initial state. When we send the received state to our Notes component, it will still show the same view.
import { useState } from 'react';

  const Notes = props => props.data.map(note => <div>{note.text}</div>);

  export default () => {

   const initialData = [{ text: 'Hey' }, { text: 'There' }];

   const [data, setData] = useState(initialData);

   return <Notes data={data} />;

  };
Now, we will add an input field and a button to the app so that we can add more notes.
Note that to return more than one component at a time, we have to wrap it in empty tags <> </>
The code will look like :
return (

     <>

       <input style={{ width: '80%' }} type="text" placeholder="Enter a new note" />

       <button>Add note</button>

       <Notes data={data} />

     </>

   );
B. Implementing useState hook in our Notes App
Clicking the button won’t do anything as we haven’t added any function to handle the clicks yet. The function should check whether the text input is empty. If the input is empty, it will create a new state from the present state & set it as the present state of the component. This will cause the component to re-render and will display the new note on screen.
const handleClick = () => {
     const text = document.querySelector('#noteinput').value.trim();
     if (text) {
       // do something
     }
   };
We can’t directly push the state to the current data variable. We’ll have to first create a copy of the variable and then push the state to it. Post that, we will set the state of the component via the setData function.
To build a new state from present state, we will use the Immer library. It takes a base state as input & outputs new state.
First, import it in your code :
import produce from 'immer';Then use it in handleClick like:
const handleClick = () => {
     const text = document.querySelector('#noteinput').value.trim();
     if (text) {
       const nextState = produce(data, draftState => {
         draftState.push({ text });
       });
       document.querySelector('#noteinput').value = '';
       setData(nextState);
     }
   };
Here, we take the present state as input (data variable), produce it to a new state by pushing text and then get the next state. This new state is set via setData(nextState). We have also cleared the text input field.
Finally, we will set the following function to our button:
import { useState } from 'react';
import produce from 'immer';
const Notes = props => props.data.map(note => <div>{note.text}</div>);
export default () => {
const initialData = [{ text: 'Hey' }, { text: 'There' }];
const [data, setData] = useState(initialData);
const handleClick = () => {
const text = document.querySelector('#noteinput').value.trim();
if (text) {
const nextState = produce(data, draftState => {
draftState.push({ text });
});
document.querySelector('#noteinput').value = '';
setData(nextState);
}
};
return (
<>
<input id="noteinput" style={{ width: '80%' }} type="text" placeholder="Enter a new note" />
<button onClick={() => handleClick()}>Add note</button>
<Notes data={data} />
</>
);
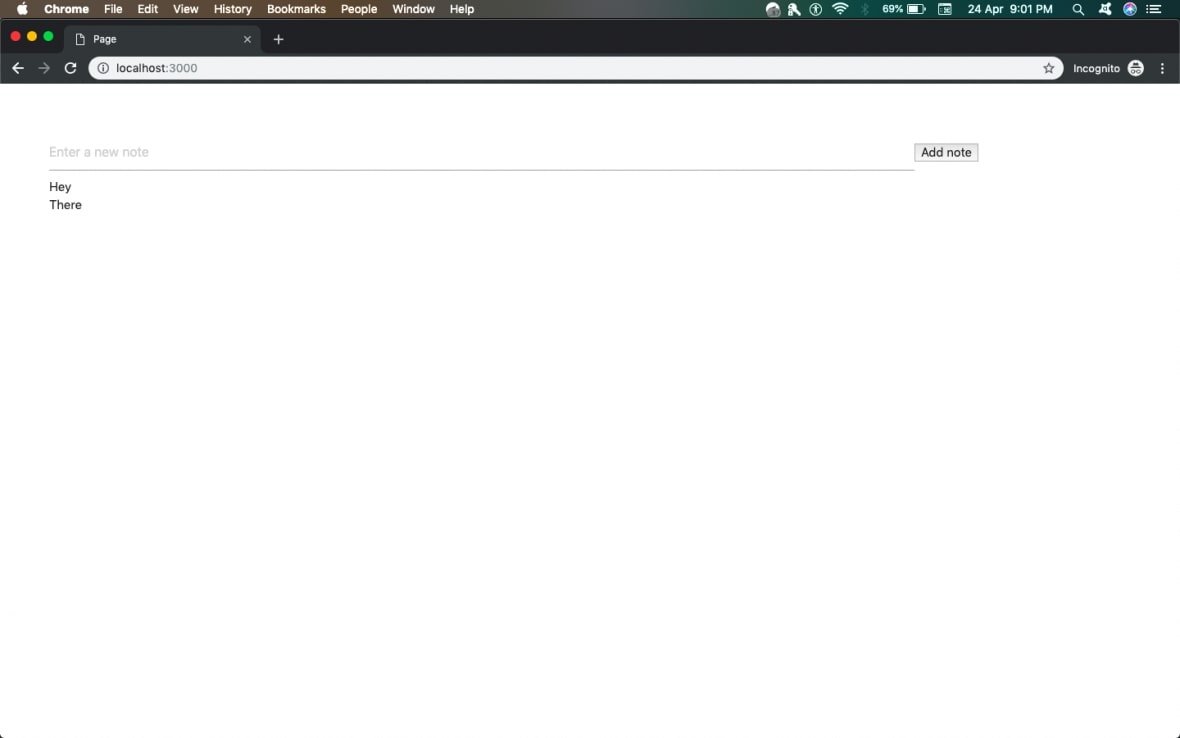
};We pass our function to the button via the onClick API & add an id to our input to identify it. This works as seen below.
However, after refreshing the page, you’ll see that our state is reset.
In the next section, we will see how to add persistence to our app by using lifecycle hooks.
3. useEffect hook
A. Understanding useEffect hook
The second hook we use is the useEffect hook. It allows you to execute code at various stages in the lifecycle of the app. We shall use this to add permanence to our app by using the localStorage API. It has a simple getItem & setItem API where a JSON object can either be stored or retrieved from the storage.
The useEffect hook takes a function as input and a variable it is linked to. In effect, when the variable changes, useEffect is called again.
useEffect(()=>{
     // do something
   }, linkedVar)
To use useEffect, import it from React :
import { useState, useEffect } from 'react';Set the initial state of our component as ‘Loading Notes …’ so the user knows our app is working while loading data from localStorage:
const initialData = [{ text: 'Loading Notes ... ' }];If we want our hook to only run once, the linkedVar can be a static value like ‘0’ or ‘1’.
B. Implementing useEffect hook in our Notes app
We will write our hook in such a way that it gets data from localStorage and then checks whether it actually exists. If it exists, it sets current state according to that data. Otherwise, it sets current state as empty.
useEffect(() => {
     if (typeof window !== 'undefined') {
       const getData = localStorage.getItem('data');
       if (getData !== '' && getData !== null) {
         return setData(JSON.parse(getData));
       }
       return setData([]);
     }
   }, 0);
This works well. However, we are still not done. We need to push newly created notes to the localStorage too.
For this, we will update the handleClick function to push new notes as soon as they’re added.
const handleClick = () => {
      const text = document.querySelector('#noteinput').value.trim();
      if (text) {
        const nextState = produce(data, draftState => {
          draftState.push({ text });
        });
        document.querySelector('#noteinput').value = '';

        if (typeof window !== 'undefined') {
          localStorage.setItem('data', JSON.stringify(nextState));
        }

        setData(nextState);
      }
    };
So, the final file will look like this:
import { useState, useEffect } from 'react';
  import produce from 'immer';

  const Notes = props => props.data.map(note => <div>{note.text}</div>);

  export default () => {
    const initialData = [{ text: 'Loading Notes ... ' }];
    const [data, setData] = useState(initialData);

    const handleClick = () => {
      const text = document.querySelector('#noteinput').value.trim();
      if (text) {
        const nextState = produce(data, draftState => {
          draftState.push({ text });
        });
        document.querySelector('#noteinput').value = '';

        if (typeof window !== 'undefined') {
          localStorage.setItem('data', JSON.stringify(nextState));
        }

        setData(nextState);
      }
    };

    useEffect(() => {
      if (typeof window !== 'undefined') {
        const getData = localStorage.getItem('data');

        if (getData !== '' && getData !== null) {
          return setData(JSON.parse(getData));
        }
        return setData([]);
      }
    }, 0);

    return (
      <>
        <input id="noteinput" style={{ width: '80%' }} type="text" placeholder="Enter a new note" />
        <button onClick={() => handleClick()}>Add note</button>
        <Notes data={data} />
      </>
    );
  };
Our app now holds data between refreshes. It looks like this:
-qhdxm.gif)
You can see a deployed version of it here: kutt.it/notes.
The complete code for the project can be found on github.
Congrats! You have successfully built a Notes app using React!
What next?
Now that you have built a fully functional React app using Hooks, let’s look at where you can head next from here.
Documentation links
https://legacy.reactjs.org/docs/hooks-intro.html
https://legacy.reactjs.org/docs/hooks-state.html
https://legacy.reactjs.org/docs/hooks-effect.html
https://github.com/akash-joshi/nextjs-config
https://github.com/mweststrate/immer
https://developer.mozilla.org/en-US/docs/Web/API/Window/localStorage
App ideas
You can use your newly gained knowledge to make a lot of apps. Here are a few ideas to get you started:
- Blogging Application
- Instagram Clone
- Reddit Clone
- Chatting Application


