
Hiring? Flexiple helps you build your dream team of developers and designers.
Build your first Android AR app using ARCore and Sceneform

Ayusch Jain
Last updated on
In this article, we will delve into the world of Android AR i.e. Augmented Reality, specifically ARCore, Google’s platform for building AR experiences. We will see how ARCore is transforming AR application development by abstracting out complex matrix & vector math and providing us with beautiful APIs for AR development.

Table of Contents
To start with, let’s take a look at what augmented reality is and why we, as developers, should be really excited for this new tech!
What is Augmented Reality?
According to the dictionary definition, augmented reality is “a technology that superimposes a computer-generated image on a user’s view of the real world, thus providing a composite view”.
Essentially, AR is a technology which enables us to render computer generated 3D object models into the real world and have it interact with its surrounding as if it were physically present at the same location.
This technology has vast applications in the areas of:
- Education: Imagine having a 3D model of a human brain on your desk.
- Tourism: To place 3D models of popular monuments in the physical world.
- Furniture Retail: A guide to check how the chair would look like in your living room before making a purchase.
- E-Commerce: Checking out your new outfit in 3D right in front of you.
- Medicine and Healthcare: Having a 3D model of various proteins present in a drug right inside the chemistry lab.
- And many more…
A few years ago, developing AR applications meant learning OpenGL, and complex vector math. In 2018, Google released ARCore along with Sceneform SDK (for android) in order to make AR development easier for everyone. So, let’s have a look at what ARCore has to offer.
What is ARCore?
According to the definition provided by Google, ARCore is a platform for building Android AR experiences. It enables your phone to sense its environment, understand the world and interact with the information.
ARCore works on 3 principles:
- Motion Tracking: It allows the phone to understand its current position relative to the real world.
- Understanding the Environment: It allows the phone to detect the size and location of all type of surfaces: vertical, horizontal and angled.
- Light Estimation: It allows the phone to sense the environment’s lighting condition.
As the user moves his/ her phone in the real world, ARCore is able to understand its surroundings and emulate the real world digitally, in which it can place objects. Motion tracking helps ARCore to identify features which allows it to keep a track of its location in relation to the real environment.
As of now, ARCore is available for:
- Java (Android)
- Unity (iOS and Android)
- Unreal Engine
- iOS
This list covers most of the devices and development platform for AR application development.
Sceneform
ARCore in itself isn’t an SDK, rather it is an engine that helps SDKs to render the objects. Hence, in order to make use of this functionality, Google released Sceneform SDK to enable developers to build Android AR apps without having to learn OpenGL.
Sceneform comes with many nifty features such as:
- An automatic compatibility check for ARCore enabled phones.
- Checking for camera permissions.
- A scene graph API to abstract all the complexities.
- A plugin for manipulating 3D assets.
We will now delve deep into building a sample Android AR application using Sceneform. This will help you understand Sceneform and ARCore in much more in depth.
Building your first Android AR Application
In this section, we will build a simple Android AR application and render some 3D objects into the real world.
Setup
Here’s how the completed app would look like:

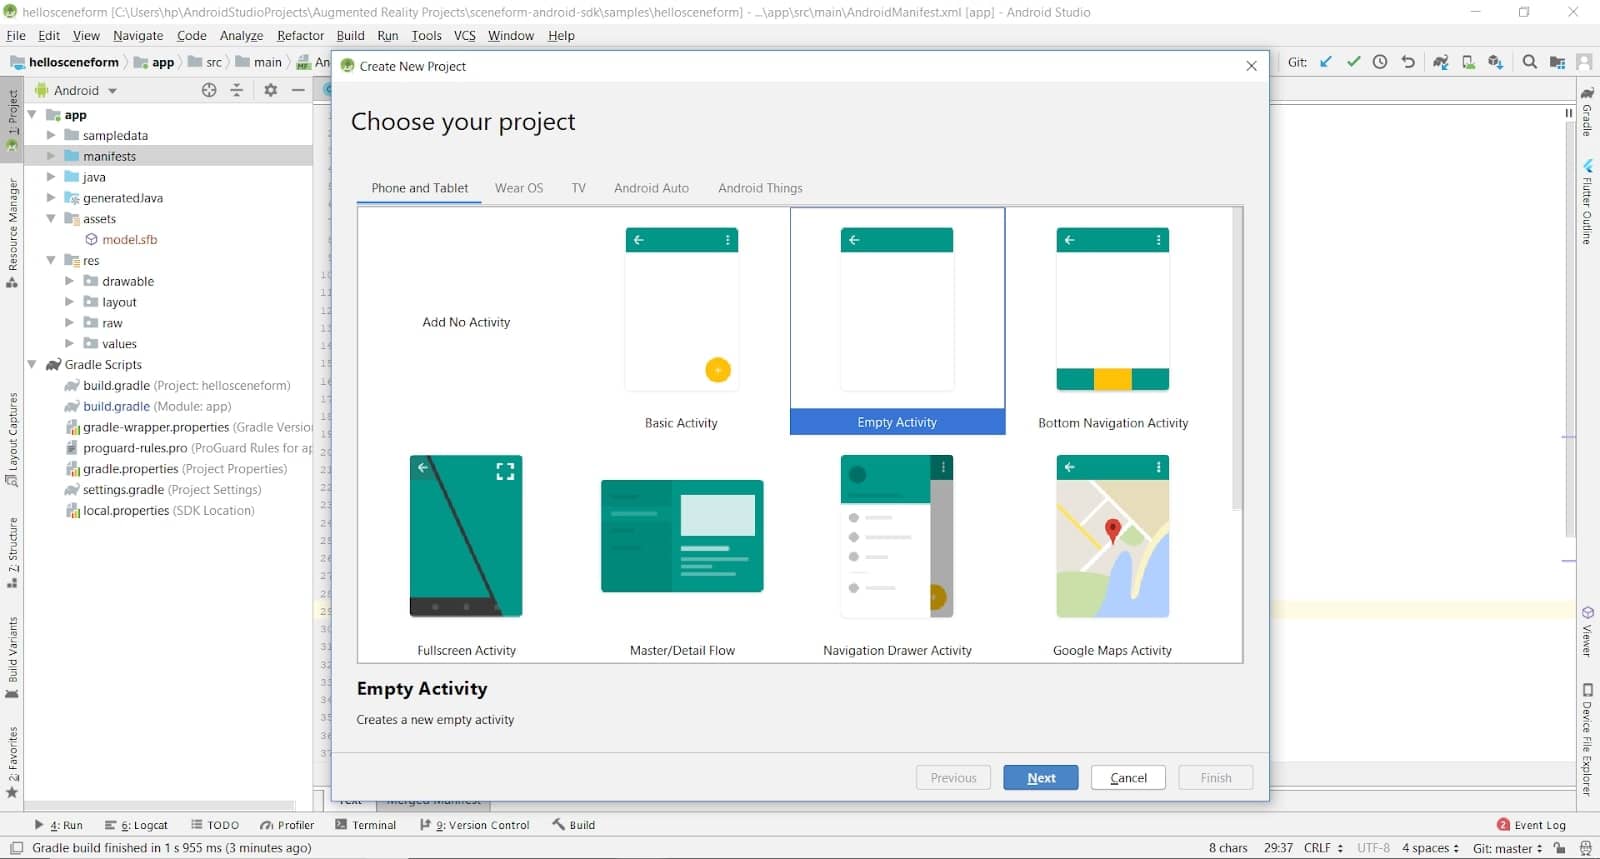
Let’s dive right in and begin by creating a new project with an empty activity.
Adding the Sceneform Plugin
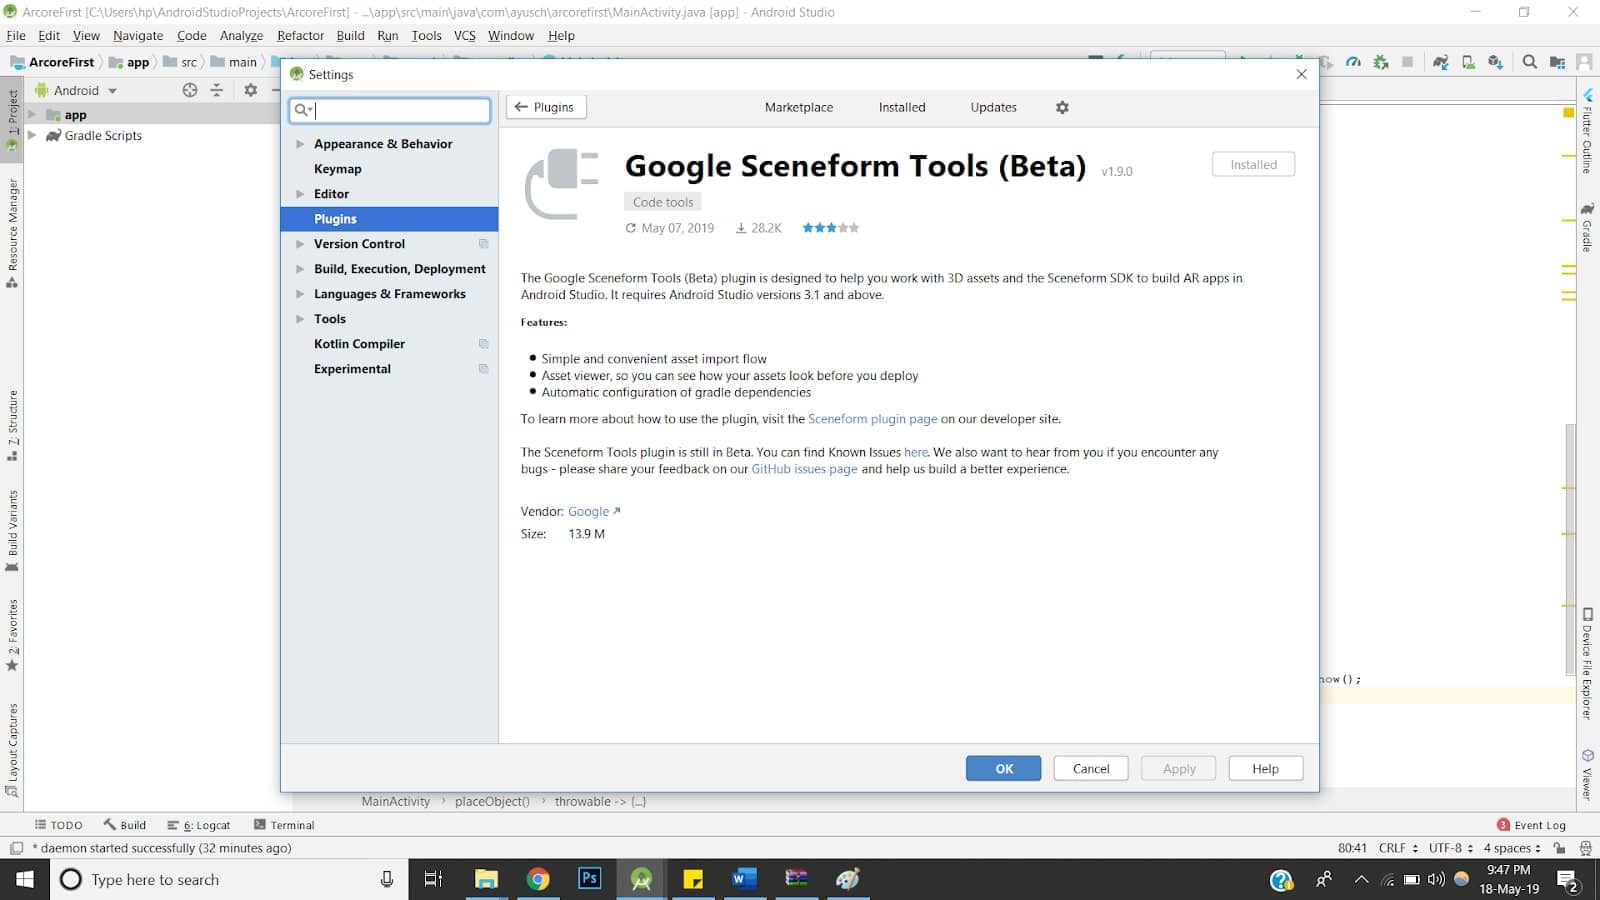
You will need to install the Sceneform Plugin to android studio. Sceneform plugin will help you with tasks such as importing a model into your Android project.
In order to install the plugin, follow the steps given below:
- For Windows users: Go to: File-> Settings-> Plugins
- For macOS users: Go to: Android Studio-> Preferences-> Plugins
- Now enter “Sceneform” in the search bar. It will be at the top named Google Sceneform Tools.
- Install the plugin and restart android studio.
Adding Dependencies
Add the following dependencies to your app level build.gradle file:
implementation 'com.google.ar.sceneform.ux:sceneform-ux:1.9.0'Important Note: Sceneform SDK requires minSdkVersion greater than or equal to 24. So, make sure that you set the minSdkVersion>= 24. Also, make sure that you have included the Maven repository in your project level build.gradle.
Updating Manifest
Add the following lines in your AndroidManifest.xml file:
<uses-permission android:name="android.permission.CAMERA" />
<uses-permission android:name="android.permission.INTERNET"/>
<uses-feature android:name="android.hardware.camera.ar" android:required="true"/>
Using ARCore requires camera permission and a camera enabled phone (obviously).
Also, add a meta data to your application tag:
<meta-data
   android:name="com.google.ar.core"
   android:value="required" />
If your app strictly requires the device to be ARCore enabled, then set required = true or if AR is not a primary feature or you have handled compatibility for non-compatible devices you can set required = false.
Adding the ArFragment
With all the initial set up done, it is now time to start by adding a ArFragment (provided in the Sceneform SDK) into our app. ArFragment automatically handles your sessions and the runtime checks necessary for the application to work.
If ARCore has not been installed on the user’s device, ArFragment urges the user to install ARCore. Also, if camera permission is not granted, it asks for camera permission as well. Hence, ArFragment is the best way to start building your very first Android ARCore application.
But if your app still needs some extended functionality, you can always subclass ArFragment and create a Fragment of your own to support your custom features.
Here’s how your layout xml file would look like:
<FrameLayout xmlns:android="http://schemas.android.com/apk/res/android"
   xmlns:tools="http://schemas.android.com/tools"
   android:layout_width="match_parent"
   android:layout_height="match_parent"
   tools:context=".HelloSceneformActivity">

 <fragment android:name="com.google.ar.sceneform.ux.ArFragment"
     android:id="@+id/ux_fragment"
     android:layout_width="match_parent"
     android:layout_height="match_parent" />

</FrameLayout>
Checking compatibility at runtime
We will check if the device:
- Is running Android API version >= 24.
- Can support OpenGL version 3.0.
The above conditions are mandatory for a device to support AR applications using ARCore and Sceneform SDK.
We intend to finish the activity if these conditions aren’t satisfied. However, you can still continue to support other features.
Adding 3D models to our application
It is now time to download and import the 3D models to be rendered into our application. In our case, we will be rendering a 3D chair in a corner of our room and moving it around.
You can download 3D models from anywhere, but Google has provided an excellent repository POLY to download 3D models for your application. You can download the models in .obj or .gltf format. We will be downloading the .obj file.
Open the project view in your android studio project and expand the app folder. You will notice a folder named “sampledata”. If not, go ahead to create one.
After your model finishes downloading, you will need to extract the downloaded zip file into this sample data folder.
You will find a .mtl file, a .obj file and a png image of the model. We’ll import the .obj file in our application using the sceneform plugin.
Importing the model using Sceneform plugin
Right click on the .obj file and you will find an option saying “Import Sceneform Asset”. Click on it and leave the settings to default. After you finish importing, the gradle would sync the project to include the asset in your application.
With this, you are done importing the 3D asset into your application. Now it’s time to write some code to include the model into the AR scene.
Building the Model
Add the following code in your java file:
protected void onCreate(Bundle savedInstanceState) {
   super.onCreate(savedInstanceState);

   if (!checkIsSupportedDeviceOrFinish(this)) {
       return;
   }

   setContentView(R.layout.activity_ux);
   arFragment = (ArFragment) getSupportFragmentManager().findFragmentById(R.id.ux_fragment);

   arFragment.setOnTapArPlaneListener(
           (HitResult hitResult, Plane plane, MotionEvent motionEvent) -> {

               Anchor anchor = hitResult.createAnchor();
               placeObject(arFragment, anchor, Uri.parse("model.sfb"));

           });
}
Let’s see what’s happening here.
- First, we get the fragment we added in our layout file with the help of supportFragmentManager and the fragment id.
- Then we need to load the model into the scene. For this, we use the ModelRenderable class provided by the Sceneform SDK. With the help of ModelRenderable’s setSource() method, we can load our model by passing in the name of the generated .sfb file.
- Model is being built on a background thread, so after the model is loaded, it’s presented to the main thread which then renders it to the scene.
- We receive the model inside the thenAccept method. If there’s any error in building the model, an exception is thrown.
Our model is loaded, now let’s place it into the scene.
Adding the Model to the AR Scene
Our AR fragment is the container of the scene and hence we need to add a model to the fragment whenever it is clicked. Hence, we’ll add an onTapListener to our fragment.
private void placeObject(ArFragment arFragment, Anchor anchor, Uri uri) {
   ModelRenderable.builder()
           .setSource(arFragment.getContext(), uri)
           .build()
           .thenAccept(modelRenderable -> addNodeToScene(arFragment, anchor, modelRenderable))
           .exceptionally(throwable -> {
                       Toast.makeText(arFragment.getContext(), "Error:" + throwable.getMessage(), Toast.LENGTH_LONG).show();
                       return null;
                   }

           );

}

private void addNodeToScene(ArFragment arFragment, Anchor anchor, Renderable renderable) {
   AnchorNode anchorNode = new AnchorNode(anchor);
   TransformableNode node = new TransformableNode(arFragment.getTransformationSystem());
   node.setRenderable(renderable);
   node.setParent(anchorNode);
   arFragment.getArSceneView().getScene().addChild(anchorNode);
   node.select();
}


public static boolean checkIsSupportedDeviceOrFinish(final Activity activity) {
   if (Build.VERSION.SDK_INT < VERSION_CODES.N) {
       Log.e(TAG, "Sceneform requires Android N or later");
       Toast.makeText(activity, "Sceneform requires Android N or later", Toast.LENGTH_LONG).show();
       activity.finish();
       return false;
   }
   String openGlVersionString =
           ((ActivityManager) activity.getSystemService(Context.ACTIVITY_SERVICE))
                   .getDeviceConfigurationInfo()
                   .getGlEsVersion();
   if (Double.parseDouble(openGlVersionString) < MIN_OPENGL_VERSION) {
       Log.e(TAG, "Sceneform requires OpenGL ES 3.0 later");
       Toast.makeText(activity, "Sceneform requires OpenGL ES 3.0 or later", Toast.LENGTH_LONG)
               .show();
       activity.finish();
       return false;
   }
   return true;
}
Using the hitResult, we can get the location tapped and create an anchor node which is the root node of our scene (image an augmented reality scene as an inverted tree).
Next, we create a TransformableNode which will be our chair and set it to the anchornode. A transformable node can react to location changes and size changes when the user drags the object or uses pinch to zoom.
Let’s have a look at some terminologies here:
- Scene: It’s the place where our 3D world will be rendered.
- HitResult: It is an imaginary ray of light coming from infinity and it’s first point of intersection with the real world is the point of tap.
- Anchor: A fixed location in the real world. Used to transform local coordinates (according to user’s display) to the real-world coordinates.
- TransformableNode: A node that can react to user’s interactions such as rotation, zoom and drag.
Here’s how your final java file would look like:
public class HelloSceneformActivity extends AppCompatActivity {
   private static final String TAG = HelloSceneformActivity.class.getSimpleName();
   private static final double MIN_OPENGL_VERSION = 3.0;

   private ArFragment arFragment;

   @Override
   protected void onCreate(Bundle savedInstanceState) {
       super.onCreate(savedInstanceState);

       if (!checkIsSupportedDeviceOrFinish(this)) {
           return;
       }

       setContentView(R.layout.activity_ux);
       arFragment = (ArFragment) getSupportFragmentManager().findFragmentById(R.id.ux_fragment);

       arFragment.setOnTapArPlaneListener(
               (HitResult hitResult, Plane plane, MotionEvent motionEvent) -> {
                   Anchor anchor = hitResult.createAnchor();
                   placeObject(arFragment, anchor, Uri.parse("model.sfb"));

               });
   }

   private void placeObject(ArFragment arFragment, Anchor anchor, Uri uri) {
       ModelRenderable.builder()
               .setSource(arFragment.getContext(), uri)
               .build()
               .thenAccept(modelRenderable -> addNodeToScene(arFragment, anchor, modelRenderable))
               .exceptionally(throwable -> {
                           Toast.makeText(arFragment.getContext(), "Error:" + throwable.getMessage(), Toast.LENGTH_LONG).show();
                           return null;
                       }

               );

   }

   private void addNodeToScene(ArFragment arFragment, Anchor anchor, Renderable renderable) {
       AnchorNode anchorNode = new AnchorNode(anchor);
       TransformableNode node = new TransformableNode(arFragment.getTransformationSystem());
       node.setRenderable(renderable);
       node.setParent(anchorNode);
       arFragment.getArSceneView().getScene().addChild(anchorNode);
       node.select();
   }


   public static boolean checkIsSupportedDeviceOrFinish(final Activity activity) {
       if (Build.VERSION.SDK_INT < VERSION_CODES.N) {
           Log.e(TAG, "Sceneform requires Android N or later");
           Toast.makeText(activity, "Sceneform requires Android N or later", Toast.LENGTH_LONG).show();
           activity.finish();
           return false;
       }
       String openGlVersionString =
               ((ActivityManager) activity.getSystemService(Context.ACTIVITY_SERVICE))
                       .getDeviceConfigurationInfo()
                       .getGlEsVersion();
       if (Double.parseDouble(openGlVersionString) < MIN_OPENGL_VERSION) {
           Log.e(TAG, "Sceneform requires OpenGL ES 3.0 later");
           Toast.makeText(activity, "Sceneform requires OpenGL ES 3.0 or later", Toast.LENGTH_LONG)
                   .show();
           activity.finish();
           return false;
       }
       return true;
   }


}
That’s it! We have built a fully functional Android AR app. You can check the entire source code on github.
What’s next?
You can clone this project from our github repository and start playing around with the code. You can practice importing multiple models, changing properties in .sfb file and adding gesture interactions to the models.
Stay tuned for more articles on Augmented Reality applications using ARCore.
We work with skilled mobile app developers to build amazing products. Do check out our services.


